Underpainting coloured pencil
Coloured pencil artists often face the challenge of white specks that distract from their work and destroy the illusion of realism.
Under a microscope, the surface of watercolour paper appears as a landscape of peaks and crevices. When artists apply dry coloured pencils, the pigment adheres to these peaks but not to the crevices.
On this page, we will look at the solution of underpainting with a translucent wash of watercolour pencil pigment, which fills these crevices and creates an even colour base.
This thin wash does not impede subsequent layers of coloured pencil, allowing artists to build rich, vibrant drawings. The tinted wash serves as an effective initial layer that enhances later additions.
Other ways artist can minimise the white specks are…
- Ensure you use artist-quality coloured pencils
- Use a sharp point which can reach down into the crevices
- Add multiple layers working in different directions to try to fill all the gaps
Underpainting coloured pencils will help speed up the process considerably.
Watercolour paper and pencils
To prevent buckling, since paper expands and contracts when exposed to water, stretch it first. You will find full instructions on the stretching watercolour paper page.
For thick watercolour papers like Arches, applying water softens the internal sizing, which restores the paper tooth (or texture)—useful when adding dry pencils over the underpainting.
If you have painted with watercolour, you will know that the pigments don’t all dissolve in the same manner.
For underpainting, the pencil pigment should fully dissolve without granulating. While granulation is desirable in some pure watercolour techniques, underpainting requires a smooth, even pigment dissolution.
Choosing the right watercolour pencils requires some testing.
Staedtler Karat Aquarelle pencils create a smooth, even dissolution without granulating. However, be cautious as these pencils can stain. Despite this, their ability to create consistent washes makes them ideal for underpainting in projects like the Dartmoor landscape tutorial.
Artists should try Caran d’Ache Supracolor and the Museum Aquarelles, but keep in mind they are both more expensive than the Staedtler pencils.
Faber Castell Albrecht Durer watercolour pencils are great for paintings, but some of their colours can granulate. This makes them less suitable for this technique.
How to underpaint with watercolour pencils
Instead of using the pencil tip directly on the paper, aim for a smoother layer by mixing the pigment with water to make a thin wash.
Follow these tips:
- Use a sharp knife to scrape pigment from the pencil tip into a palette, avoiding the wooden casing.
- You only need a small amount of pencil core shavings for the wash.
- Avoid pencils that have white in their composition, as they won't provide a strong enough wash.
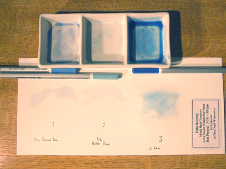
In the photo, you see Powder Blue (left), Sky Blue (centre), and Blue (right).
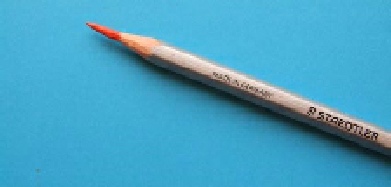 The pencil needs a long sharp point from which you remove powdered pigment with a knife
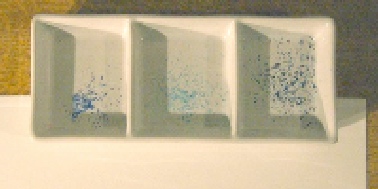 Keep in mind you only require a small amount of dry colour in the dish
Sky blue, which has a lot of white, is barely visible when painted. However, the Blue is very strong, so use it sparingly. For this experiment, I used approximately the same amount of pigment for each colour in the palette.
A medium round or flat brush is suitable for underpainting, but check out the watercolour brushes page for more information on what makes a good choice.
Underpainting coloured pencil demonstration
I drew the following demonstration from imagination. I created it to guide you through the process of creating an underpainting and subsequently working on top of it with coloured pencils.
I placed the initial underpainting on the paper with lots of space around it, allowing for additions to the scene on the left as the picture progressed. This enhancement improved the overall composition.
In the final version, I removed some of the under painted foliage to the right of the copper beech tree to reveal more of the sky over the field. Although inserting a cloud wasn't entirely successful, it's hardly noticeable in the original completed picture.
I lightly sketched in the minimal details in the cottage in the background after the underpainting. This approach helps the cottage blend well into the scene instead of standing out.
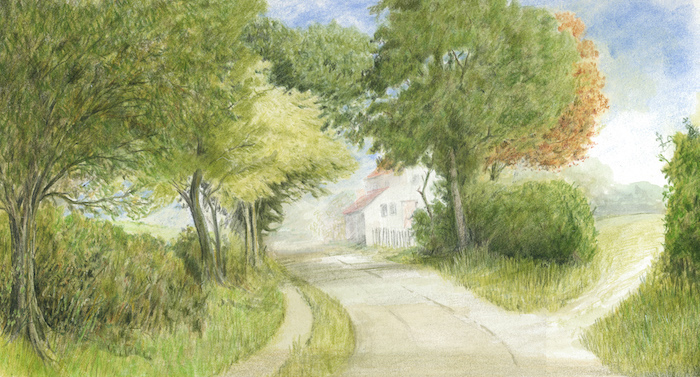
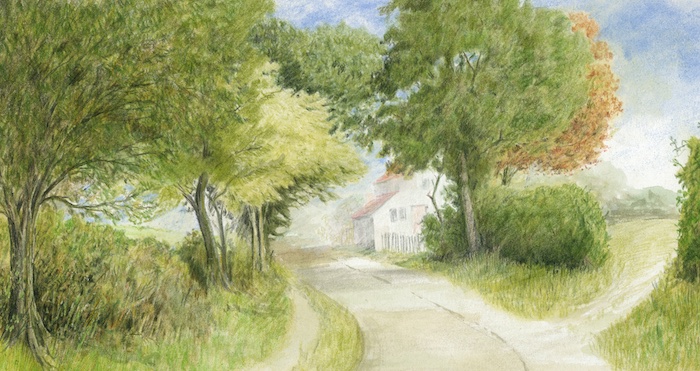
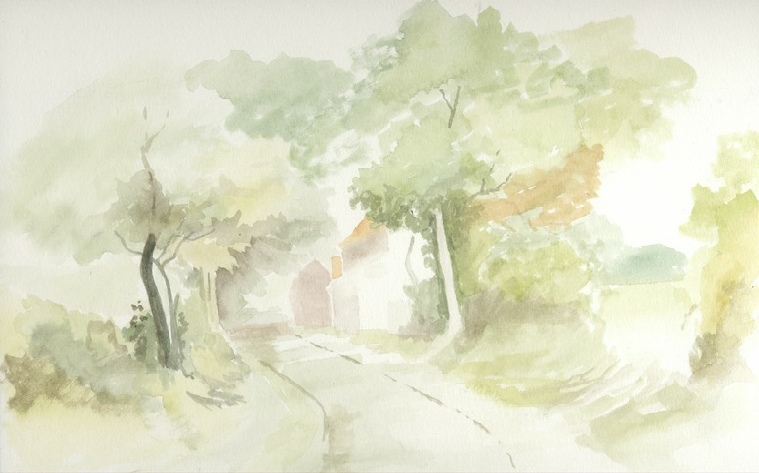 Country Lane - the first washes
Although this isn't a step by step tutorial, do try something similar to see for yourself what is possible with this technique.
Mixing up a limited range of soft, pale greens, yellows and oranges provides the subtle hues for the first thin washes.
Keeping the direction of the light in mind enables shadows to give the scene depth. You don't need to worry about mistakes in a quick drawing like this. If necessary the dry coloured pencil work will help disguise any areas that don't turn out quite as originally planned.
Keep your shading very light so that you have control over the eventual depth/density of colour. After washing in the first layer you can then continue with dry pencil work on top. The detailed step by step titled Coventry Canal shows an example of this approach.
As you can see from the above example, when underpainting coloured pencil you only need a THIN layer of colour. It is better to use two thin layers of colour than one thicker one.
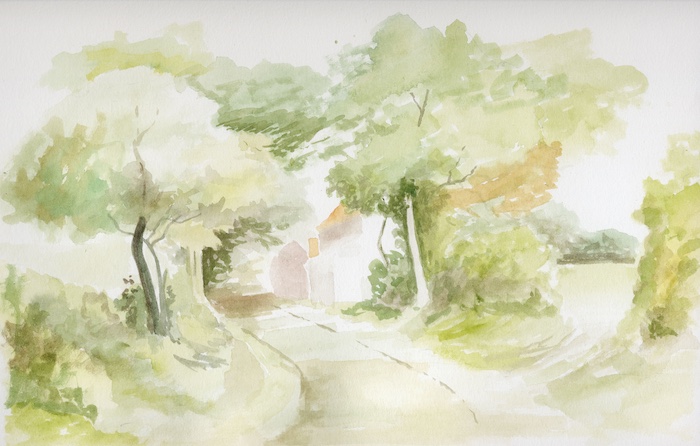 Second layers of wash on the paper
With the second layers of wash, concentrate on where you need the greater depth of colour.
Once the washes are dry you can begin to build up the dry pencil on top of the underpainting.
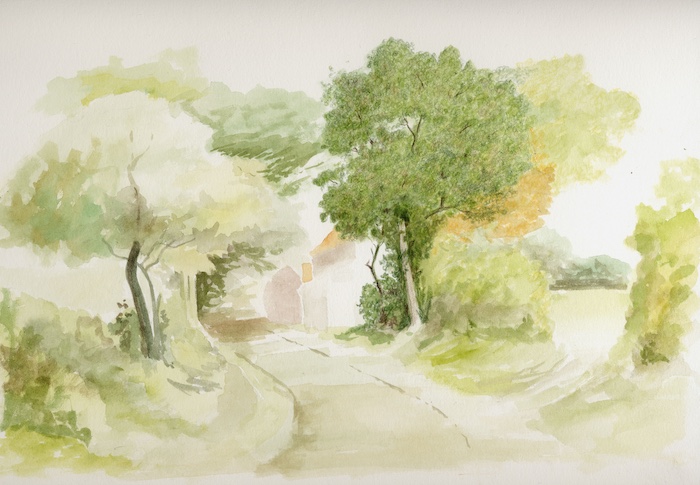
Add darker shades using dry coloured pencil. I added an additional tree on the left to balance the composition.
Add the sky at the top and minimal work to the cottage to give an indication of windows and shadows. Build up the right hand greenery with dry pencil.

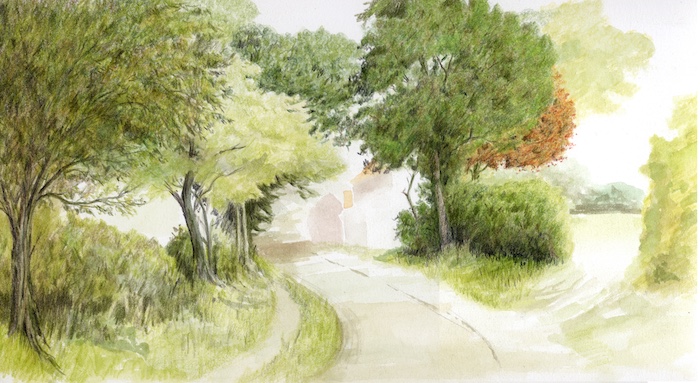
After the final adjustments here is our completed image showing the benefits of underpainting coloured pencil.
With these simple steps, you can start underpainting your coloured pencil artworks and achieve stunning results. Try it out today and see the difference it makes in your art!
You might like these
Aquarelle Background Tutorial: How To Use Watercolor Pencils
Aquarelle background tutorial - Scottish Hillside Scene - using watercolor pencils
Watercolour pencil tutorial - Italian Street Scene
A step-by-step demonstration showing how to create an Italian street scene using watercolour pencils from Caran d'Ache
Watercolor Pencil Painting Of Coventry Canal - Step By Step
Watercolor pencil painting techniques used to depict an English canal scene. Step by step tutorial for water soluble pencils


- Home
- Watercolor Pencils
- Country Lane tutorial
Would you like our occasional newsletter?
Home | About Us | Contact Us | Privacy Policy
Copyright Peter Weatherill and Carol Leather - 2009-2024